

How To Remove Echo In Audacity
First, the Audacity remove echo role in this gratuitous and open-source software is one of its many functions that assist edit audio files and brand them sound better.
Yous tin also use Audacity in the following:
- Removing sound reverb
- Removing background noise
- Removing vocals
- Recording audio
- Removing wind audio
Still, fifty-fifty with the use of sophisticated editing tools such as Audacity, completely eliminating echo and reverb effects is next to incommunicable. All you can do is reduce these sound reflections using the many tools in Audacity.
Stride-By-Step Guide on How to Remove Repeat in Audacity
While completely eliminating echo is not possible, Audacity has tools that assist in reducing sound reflections to a level that is nearly undetectable.
Here is a quick outline of how to practice it using Audacity with and without a plug-in. After downloading the Audacity plan from their website, start it. And then, follow these steps.
Without using a plug-in
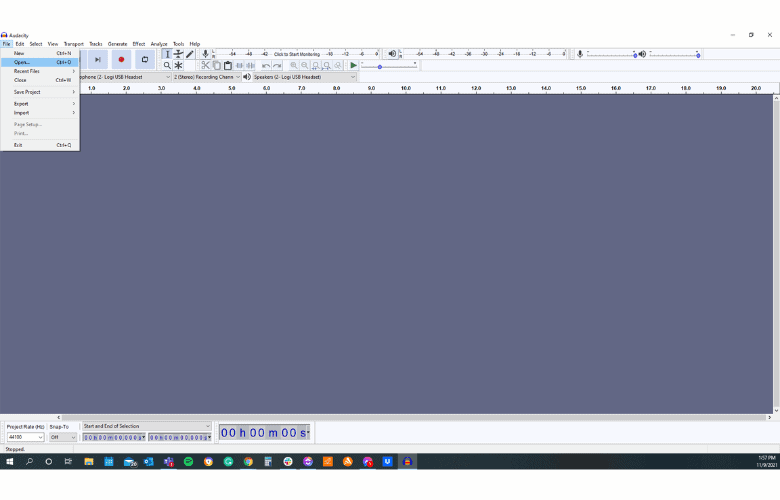
- At the meridian of your screen, click on the FILE tab.
- From the dropdown menu, choose OPEN.
- On the window that appears, click the Type OF FILES bar. Select ALL SUPPORTED TYPES.
- Another window appears. Click on the file you need to edit. Click OPEN. Brand sure to have a copy of the file so y'all will not use your original re-create to practise your editing.
Yous can edit either the whole sound file or simply a function of it. If it is the whole file that y'all want to edit, press Ctrl+A (if using Windows). For Mac users, press Command+A. If you need to edit merely a segment of the file, click on i end of the segment and elevate the mouse all the way to the other end.
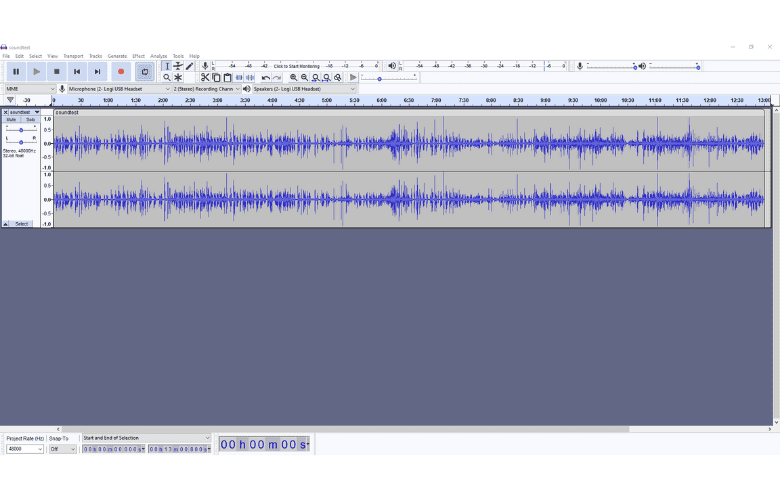
On the screen, y'all tin run across an image of the sound waves of your sound file. To the left of that prototype is the role that shows the bad component or the groundwork noise. Move your mouse and scroll it over that portion. That portion is as well called the surrounding noise.
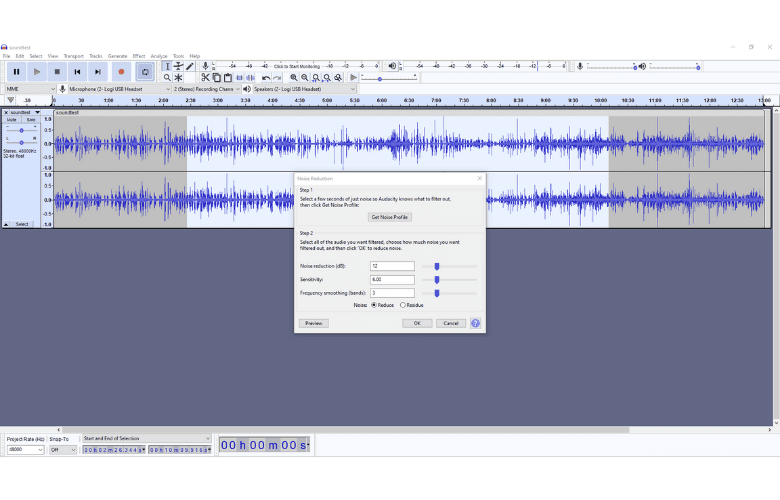
Select the segment and continue to generate a profile for it. Go to the Effects tab at the upper portion of the screen. Click that tab and select Dissonance REDUCTION from the dropdown card. Turning the noise reduction slider higher results in better sound quality.
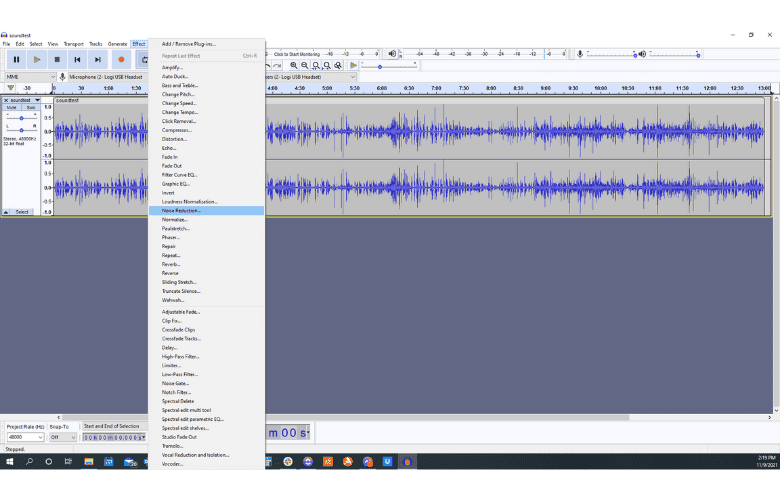
After clicking the noise reduction tab, the racket reduction box appears. At that place you lot can see the noise reduction level of the segment you are editing. You lot likewise see there the sensitivity level of that segment. Click on the GET NOISE PROFILE TAB located in the eye portion of the box.
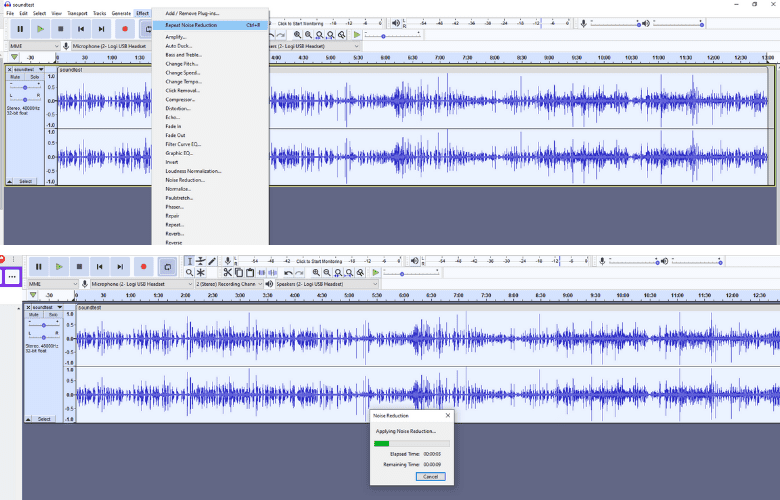
After getting the noise contour, hit ctrl+A again and click EFFECTS. Choose REPEAT Dissonance REDUCTION from the dropdown menu. Another box will appear, indicating that racket reduction is ongoing. When that box disappears, listen to the audio by clicking the play push button at the superlative left corner of the screen.
In most cases, at that place is still some background noise. Y'all can repeat the process – select the audio segment>>click the Effects tab>>select NOISE REDUCTION>>click GET NOISE PROFILE>>hit cntrl+A>>click EFFECTS>>click Echo Dissonance REDUCTION.
After that, play your audio file one more than time. The background dissonance should be less aural now, then that should be okay for you.
The next thing in this editing process is removing echo.
Proceed to remove echo. To remove the echo from your audio, once again striking contrl+A. So go to EFFECTS and select AMPLIFY. A box appears. Enter ane.667 every bit your Distension level (i.half dozen or i.7 would also exist okay to use equally your distension point). Click the PREVIEW push. Then click OK.
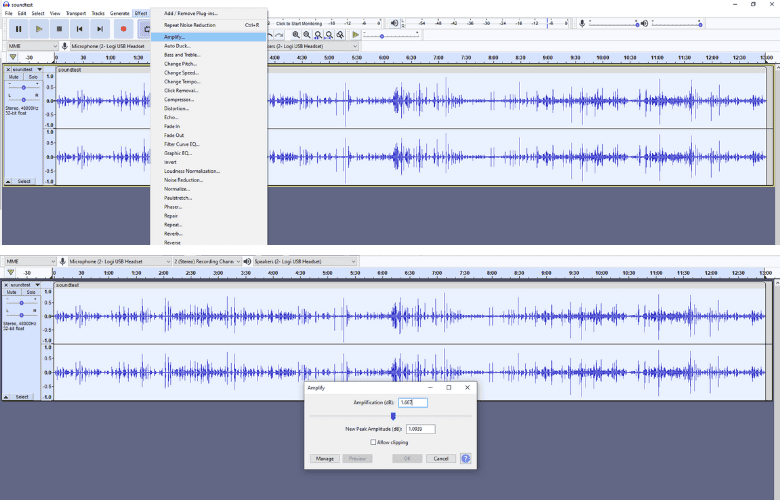
What this step does is modify the frequency of your audio to a specific limit that information technology should not be able to cross. (If in the noise reduction stride, your audio'south volume decreases, you can increase it once more also by using the AMPLIFY function.)
The adjacent step is compression. Once more hit cntrl+A, then go to Furnishings. Cull COMPRESSION. In the box that appears, ready THRESHOLD to minus 15 and Noise FLOOR to minus xl. Then change the RATIO value to two:1. Also, alter the values of ATTACK TIME and RELEASE Time to 0.xx seconds and 1.0 seconds. Click OK.
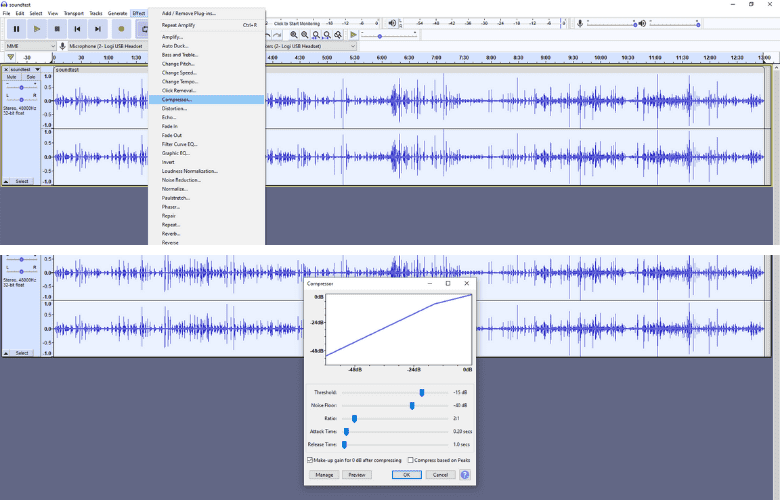
Play the sound file again. You can still hear the echo, but it has become less audible.
We have 2 more steps away from making the echo equally low as possible. Go along to add the filters.
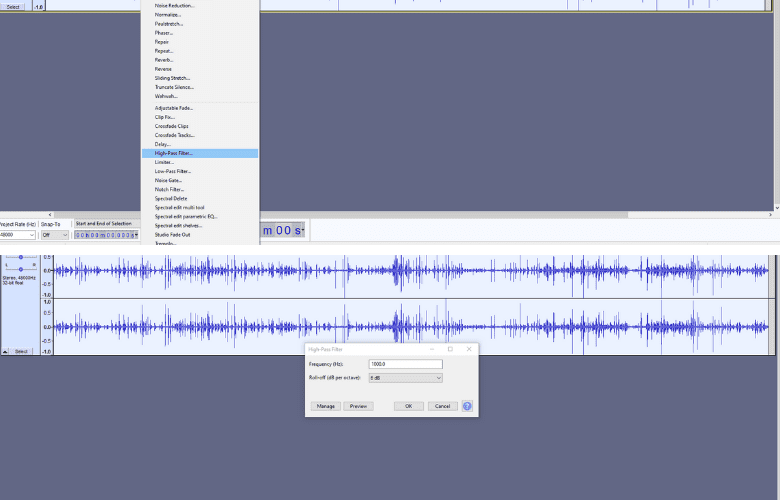
Add together the filters so that the audio will be clearer, and the repeat will further be removed. Hitting cntrl+A and got to Effects. Click High PASS FILTER. Set FREQUENCY to g.0 and ROLL OFF to 6. Click OK. Play the audio again.
At present, you can run across that the sound is a little fleck crunchy. To remove the crunchiness of the sound, practice the same initial steps. In EFFECTS, find EQUALIZER and click it. The box that appears is chosen BASS BOOST. Click the BASS BOOST button and hit OK. Do this footstep twice and play the file once more.
If you are not sure whether to use the HIGH Pass or the LOW Laissez passer filter, y'all can experiment with the effect of each filter. Sound experts recommend using the LOW Laissez passer filter if the audio is muffled or too low and using the Loftier Pass filter if the audio is besides loftier-pitched.
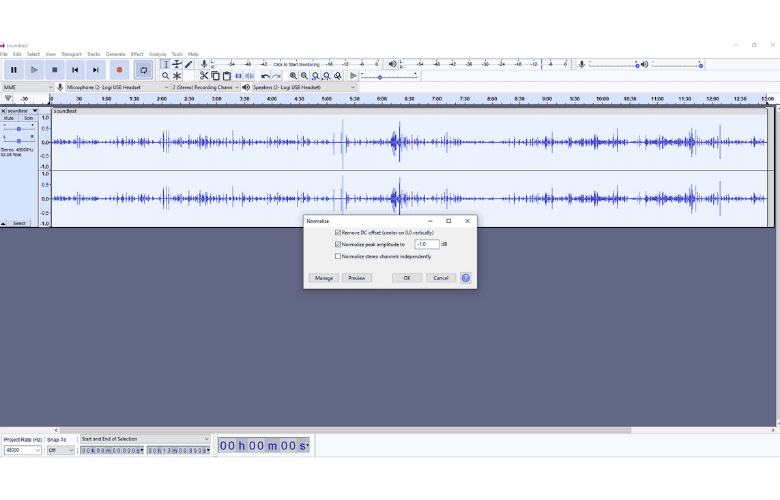
Once you are satisfied with the effect, proceed to the normalization pace. Click the Clarify tab at the height of the screen and select NORMALIZE from the dropdown carte. In the box that appears, place bank check marks on the beginning two items and get out the third item unchecked. Then hitting the OK button.
Click the FILE button and go to EXPORT VIDEO. Then go to SAVE AS Type (mp3, wav, etc.). Finally, go to SAVE Project AS to salve your edited audio file.
With the apply of a plug-in
There are many plug-ins for Audacity, and most of them are free. Withal, for the particular trouble of echo in audio files, experts recommend using Dissonance Gate. It is a plug-in that can enhance the quality of sound by reducing echo.
Download Noise Gate. Use this link.
- Put the file in the Plug-Ins folder. Make sure that Audacity is not open while you lot do this.
- Launch Brazenness and click Effects. Cull Add together/REMOVE PLUGINS.
- Choose Noise Gate and enable it.
- Continue to reduce the repeat in your audio file. Input the following:
- 100 for Level Reduction
- thirty for Gate Threshold
- 75 for Assault/Disuse
If this setting failed to reduce the echo, gradually increase the Gate Threshold. Increment information technology gradually considering increasing the Gate Threshold sometimes results in important sound parts getting cut. If that happens, decrease the Gate Threshold.
Setting the right threshold is virtually important. Also, make sure that you have the best settings for the attack/decay and level reduction.
Skillful Tip: Noise Gate is practiced at preventing unwanted sounds from coming through. Sounds that accept not yet striking the threshold cannot come through. So, sounds that are loud can get "over" the gate or the threshold, while quieter sounds or noises are held back.
If y'all do not want noises to creep into your mix, Noise Gate is the best tool for that purpose. Information technology can help subdue an audible hiss from an amplifier. Also, if the vocalizer likes humming between verses but does non want the hums picked upwardly and exist audible in the final mix, Noise Gate is the perfect tool for that.
Installing Brazenness Plug-Ins
You tin download Audacity plug-ins and get extra functionality for the software. Plug-ins give actress effects and boosted audio generation and assay capabilities. You may likewise want to install libraries that will allow you to consign or import audio formats.
Proficient Tip: For installing plug-ins, head to the Audacity website and become the instructions provided on the site. Annotation that the instructions differ depending on the platform and the plug-in blazon. Available on the site are instructions for Windows, Mac, and Linux users.
Concerning Audacity libraries, you can use the LAME MP3 encoding library or the FFmpeg import/export library. LAME MP3 enables Brazenness to export audio files in MP3 format. It is now bundled in with the newest version of Brazenness.
FFmpeg, on the other hand, works for many additional formats, such every bit WMA, M4A, AMR (NB), and AC3. It also works for importing audio from video files. Use this link to acquire how to install the FFmpeg library.
Decision
Using Audacity to remove echo from sound files does non require users to be experts and takes only a few steps to complete. The steps are presented above, covering instructions for both with and without the employ of a plug-in.
Keep in mind that the didactics presented discusses racket reduction first before proceeding to remove the echo. Note likewise that, for well-nigh of the steps, the EFFECTS tab or function is used. Check out if the plug-ins presented can aid you with your project as well.
So, download and launch Brazenness and follow the instructions above.
Is this mail service helpful to you lot? Leave your comments or questions below.
Source: https://playthetunes.com/audacity-remove-echo/
0 Response to "How To Remove Echo In Audacity"
Post a Comment